Software:
3ds max 2019 | Arnold 5
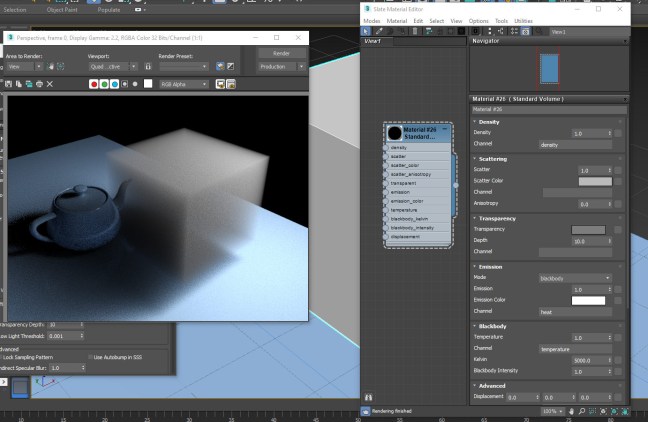
In-order for objects in 3ds max to be rendered as volumes with Arnold, the object mesh has to be converted to a volume, and a Standard Volume material assigned to the object:
- Add an Arnold Properties modifier to the object.
- Under Volume set the Step Size to a value higher than 0.0.

- Assign a Standard Volume material to the object and set it’s parameters to design the volumetric effect:

Examples:
* Note that both Density and Depth control the transparency or ‘thickness’ of the volume. (lower Depth setting creates a thicker volume)
* When Scattering is set to 0.0 the volume will have only a absorption effect
In this example an Arnold Noise map is connected to the Standard Volume‘s Density parameter:
* Note that the Scale values must be set correctly in order to actually get a ‘cloudy’ effect.
* Note that the noise color values are now controlling the Density of the volume.
Related:
Arnold for 3ds max God Rays


