UE4 – Loading shaders from within the project folder

Software:
Unreal Engine 4.25

*Also tested on Unreal Engine 5.0.1

Disclaimer:
I’m probably the 10th guy that’s documenting these steps on the web,
I didn’t come up with this solution myself, I learned it from the sources listed below.
The reason I’m documenting this (again) myself is to have a clear source I can come back to for this issue because I’m absolutely incapable of remembering subjects like this…… :-\
If you find inaccuracies in the steps I’m detailing or my explanation, I’ll be very grateful if you share a comment.

  1. https://forums.unrealengine.com/development-discussion/rendering/1562454-virtual-shader-source-path-link-custom-shaders-shadertoy-demo-download
  2. https://dinwy.github.io/study/2019/july/customShaderInUE4/
  3. https://forums.unrealengine.com/community/community-content-tools-and-tutorials/1710373-using-external-shader-files-ush-usf-and-getting-the-most-of-the-custom-node

In short:
AFAIK since version 4.21 UE doesn’t load custom node shader code from your project/Shaders folder by default anymore, but only from the shaders folder in the engine installation, which makes it less practical for developing shaders for specific projects.


Steps for setting the UE project to load shaders from the project folder in UE 4.22:

> The examples here are for a project named: “Tech_Lab”

A. The project must be a C++ project:

So either create a new project, define as such or just create a new C++ class and compile the project with it to convert it to a C++ project.
Notes:
a. You may need to right click the .uproject file icon and and Generate Visual Studio Project Files for the project to load correctly into Visual Studio and compile.
b. You can delete the unneeded C++ class you added after the new settings took place.

B. Create a folder for the shader files:

Typically, it will be called “Shaders” and will be placed in the project root folder.

C. Add the RenderCore module to the project:

This is done by adding string “RenderCore” to array of public dependency modules in the <project>.build.cs file:

PublicDependencyModuleNames.AddRange(new string[] { "RenderCore", "Core", "CoreUObject", "Engine", "InputCore" });
(see image)

Notes:
a. In UE 4.21 it should be ShaderCore.
b. This addition is needed in-order to compile a new primary project module (next step).

D. Define a custom primary module for your project:

In <project_name>.h file add a new module named F<project_name>Module, with a StartupModule function overrides.
Notes:
a. We have add an include statement for “Modules/ModuleManager”.
b. The <project_name>.h file is located in the /Source/<project_name> folder.
c. Some sources state that you also have to override the ShutdownModule function, with an empty override, it works for me without this (maybe its just a mistake..)

E. Implement the function override,
and set the custom module as the project primary module:

In <project_name>.cpp file, add the StartupModule override,
With the definition of the added shaders path:
FString ShaderDirectory = FPaths::Combine(FPaths::ProjectDir(), TEXT("Shaders"));

and mapping this new path as “/Project” for conveniently including it:
AddShaderSourceDirectoryMapping("/Project", ShaderDirectory);

Last thing to do is to replace “FDefaultGameModuleImpl” with our custom module name in the IMPLEMENT_PRIMARY_GAME_MODULE macro:
IMPLEMENT_PRIMARY_GAME_MODULE(FTech_LabModule, Tech_Lab, "Tech_Lab" );

Notes:
a. We must include “Misc/Paths”
b. Note that the addition of this folder mapping is restricted to versions 4.22 and higher via a compiler directive condition. for version 4.21, you should state “ENGINE_MINOR_VERSION >= 21:

Note for UE5:
Unreal Engine 5 supports this from the get go so this compiler directive condition should be deleted for this to work.

F. Wrapping up:

After taking these steps and compiling the project.
You should be able to include .ush and .usf files stored in <your_ue_project>/Shaders with the “Project” path mapping:
include "/Project/test.usf"

That’s it! 🙂

I hope you found this helpful,
And if you encountered errors, or inaccuracies,
I’ll be grateful if you’ll take the time to comment.


Related:

  1. UE4 – Cyber enhancement shader
  2. UE4 – Fog post process effect

Blender to Unreal Engine tips

Software:
Blender 2.9 | Unreal Engine 4.25

The following is a list of guidelines for preparation and export of 3D content from Blender to Unreal Engine 4 via the FBX file format.

Disclaimer:
This is not a formal specification.
It’s a list of tips I found to work well in my own experience.
* Some of the issues listed here may have already been solved


Blender Scene and model settings:

System units in Blender:
Define the scene units in Blender as:
Metric unit with 0.01 scale (centimeters)
And model your content correctly using centimeter units.
* Modeling in 1 meter units may seem to be imported correctly into UE4 but will cause unsolvable problems like a skeletal mesh physics asset having incorrect auto-generated shapes, a problem that in my experience can’t be fixed manually.

Transform:
Model your model in Blender facing the -Y world axis, +Z obviously being up (obviously for Blender).
* This way the model is aligned to Blender’s views so the front view displays the model’s front etc.
Make sure to apply your model’s transformations before export.

Armatures:
Make sure the Armature object isn’t named “Armature”.
naming or leaving the Blender skeleton named “Armature” will cause the UE4 importer to fail due to “multiple roots”.
* Also remember some weird related bug with animation scale incorrectly imported, but can’t confirm this now..
No need for a dedicated root bone in the hierarchy. the Armature object is the root of the bone hierarchy.
* See export option below

Texture baking:
Set the normal map’s green channel to -Y.
* This is not critical at all because if baked as +Y it can easily be fixed in UE4.

Metadata:
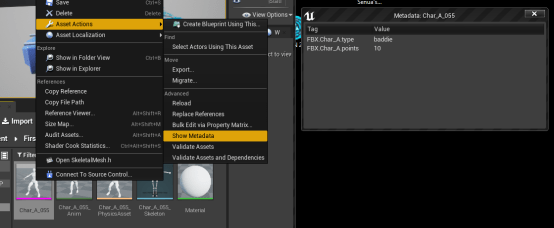
Blender custom properties import as UE4 asset metadata that can be read by editor scripts for automation purposes.
* See export option below


FBX Blender export and UE4 import settings:

I recommend saving an FBX export preset with these settings.

Optional:
I prefer the export settings to include only selected objects.
* It’s more efficient for me to select the specifics objects I want to export into a single FBX file prior to export, than to delete all the temp / reference / draft objects from the scene.
If you want to export Blender custom properties with to the FBX check the “Custom Properties” option

Axes:
Blender’s native model/world orientation is model’s forward facing the -Y axis, left side facing +X and of-course up facing +Z.
UE4’s native model/world orientation is model’s forward facing the +X axis, left side facing -Y and up facing +Z.
There are axis settings in Blender’s FBX export module, that theoretically, should be set like this:

However, in tests I did, The axis settings made no difference when importing to UE4, even when setting intentionally incorrect upside-down axes.
Maybe the FBX exporter writes these settings to metadata that the UE4 importer doesn’t read..
From my experience, what’s important is to orient the model correctly in Blender (see above), apply the transformations,
And in the UE4 import menu, check the “Force Front XAxis” option:

Geometry:
Make sure either “Edge” or “Face” is chosen in the “Smoothing” option to import the mesh’s smooth shading correctly ans avoid a smoothing groups warning on import:

Optional:
Depending on how much control you need over the mesh’s tangent space,
You may want to check the “Tangent Space” export option,
This will make Blender export the full tangent space to the FBX and make UE4 read it from FBX instead of generate it automatically.
* For this option to be supported, the mesh geometry must have only triangle or quad polys.
In the UE4 import settings, choose the “Import Normals and Tangents” option in “Normal Import Method”:

Armature:
Set “Armature FBXNode Type” to “Root”.
Uncheck the “Add Leaf Bones” option to avoid adding unneeded end bones.
Set bones primary axis as X, and secondary axis as -Z.

Animation:
Uncheck “All Actions” to avoid exporting actions that don’t actually belong to the skeleton.
* Un-related animations in the FBX can also corrupt the character rest pose in UE.
The “NLA Strips” option is useful for exporting a library of animations with the skeleton.
* In Blender’s NLA editor, activate the actions you want exported to the FBX.


Related:
3ds max & V-Ray to UE4 Datasmith workflow

UE4 – Create a Billboard (Sprite)

Software:
Unreal Engine 4.18

  1. Create a new Blueprint Actor.
  2. Enter the Actor Editor and add a‘Billboard’ component to it.
  3. In the Billboard’s Details panel, under ‘Sprite’, select the Billboard texture.
  4. In the Billboard’s Details panel, under ‘Rendering’, Uncheck ‘Hidden In Game’.

Untitled-2.jpg