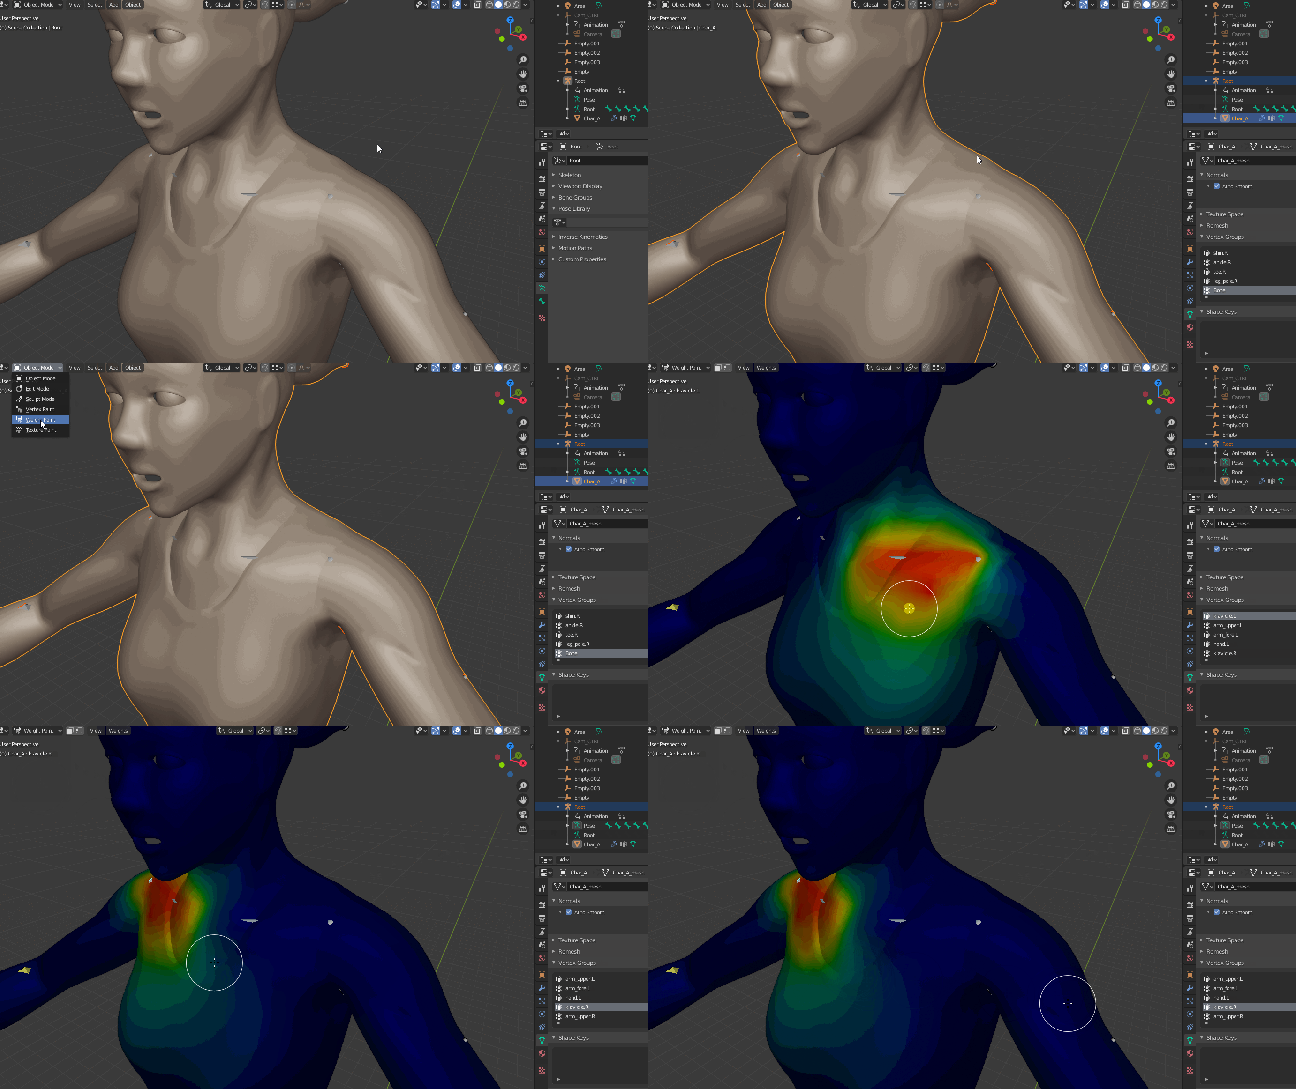
Blender 2.8 – Select bones in Weight Paint mode

Software:
Blender 2.8

To select bones while in Weight Paint mode in Blender 2.8:

  1. Select the Armature
  2. Shift select the skinned mesh
  3. Switch mode to Weight Paint
  4. Shift-Click bones to select them
    * Shift double click to select bones hidden under the mesh

wpaint.gif

Blender 2.8 character project – Part 3 – Modeling proxy clothes and props

Software:
Blender 2.8

This is the third part of a personal project I began working on,
Development of a realistic character in Blender 2.8 for games and animation.

<– Go to the project home
<– Go to the first part of the project
<– Go to the second part of the project

The third part of the project was a ~7 hour modeling session in which the focus was mainly on proxy-quality (rough) modeling of clothing and props.
In this stage of the project, I decided that the creative theme for character will be a tough detective. a sort of an Asian ‘Dirty harry’ character, and this concept was the drive behind the styling of the characters clothes and and props.


Result after part 3:

> Total accumulated work time: ~17.5 hours


Some tips and settings for modeling the clothes


Blender 2.8 character project – Part 2 – Sculpting – Refining the model

Software:
Blender 2.8

This is the second part of a personal project I began working on,
Development of a realistic character in Blender 2.8 for games and animation.

I will be video capturing the whole project’s progress and sharing it on my vimeo channel.

<– Go to the project home
<– Go to the first part of the project

The second part of the project was a ~5 hour sculpting session focused mainly on refining the model, improving its proportions and anatomical detail, and adding internal parts like eyeballs and teeth.
In this part the character design was developed into a more masculine man and less skinny, the general idea still being an elder Asian action figure.

Result after part 2:
> Total accumulated work time: ~10.5 hours

tt_25.06.19.gif


Go to part 3 of the project –>

Blender 2.8 character project – Part 1 – Sculpting – Freestyle rough draft

Software:
Blender 2.8

This is the first part of a personal project I began working on,
Development of a realistic character in Blender 2.8 for games and animation.

<– Go to the project home

The first step of the project is a completely free-style / free-form ~5.5 hour sculpting session in which I’m not really trying to do anything accurate but just get used to 3D sculpting in Blender 2.8.
I’m imagining an elder Asian action character, at this point not sure what he’ll end up being. possible themes are:
ninja, samurai, cyber themed ninja or tough detective.

Result after part 1:
> Total accumulated work time: ~5.5 hours


Go to part 2 of the project –>

Cycles render – Using the Normal Blue channel for top side effects

Software:
Blender 2.8 | Cycles Render

1.jpg

The shading normal‘s Z component can be easily used as a ready-to-use procedural mask for ‘covering effects’ like dust, snow, and if baked, also as a base for particle effects like debris and vegetation.

This simple shading flow example the shading normal‘s Z component, that represents how much the surface is facing upwards is separated , mixed (multiplied) with a noise textured and than fed into a ColorRamp Converter node for fine tuning the resulting mask:

2

This is the full shading flow of the snow effect in the image above:

3.jpg