Blender 2.8 – Select bones in Weight Paint mode

Software:
Blender 2.8

To select bones while in Weight Paint mode in Blender 2.8:

  1. Select the Armature
  2. Shift select the skinned mesh
  3. Switch mode to Weight Paint
  4. Shift-Click bones to select them
    * Shift double click to select bones hidden under the mesh

Update:
This has also been verified on Blender 3.6

wpaint.gif

Blender – Copy Bone Constraints

Software:
Blender 2.83

To copy bone constraints from one bone to other bones:

  1. In Blender Preferences > Add-ons:
    Find the Interface: Copy Attributes Menu add-on, and enable it.
    Annotation 2019-12-12 165824
  2. In Armature Pose Mode,
    Select one or more bones, and select last the bone that has the constraints you want to copy.
  3. Press Ctrl + C to open the Copy Attributes menu, and select Copy Bone Constraints.

copyconstraints


Related post:

Quickly setup bone constraints

Blender Skeleton (Armature) Mirroring

Software:
Blender 2.8

To mirror a skeleton (Armature) in Blender:

  1. Create bones for one side of the rig and name them with “.L” for Left or “.R” for right.
  2. Select all the bones on that side.
  3. In Armature Edit Mode choose:
    Armature > Symmetrize

Blender will create mirrored copies of all the bones with respect to the Armature origin and flip their names to names ending with the opposite side.

  • When editing properly symmetrized bones,
    The X-Axis Mirror tool option will simultaneously update both sides of the Armature to maintain symmetry.

Untitled-1


Untitled-3.jpg

Untitled-4


Blender – Create constraints quickly

Software:
Blender 2.79

To create constraints quickly:

  1. Select the target object.
  2. Shift + Select the object to constrain (Active Object)
  3. Press Ctrl + Shift + C
  4. Choose the wanted constraint type.
  5. select the constrained object to set the constraint parameters.

cons

cons2
Related post:
Copy bone constraints

Animating visibility in Blender

Software:
Blender 2.78

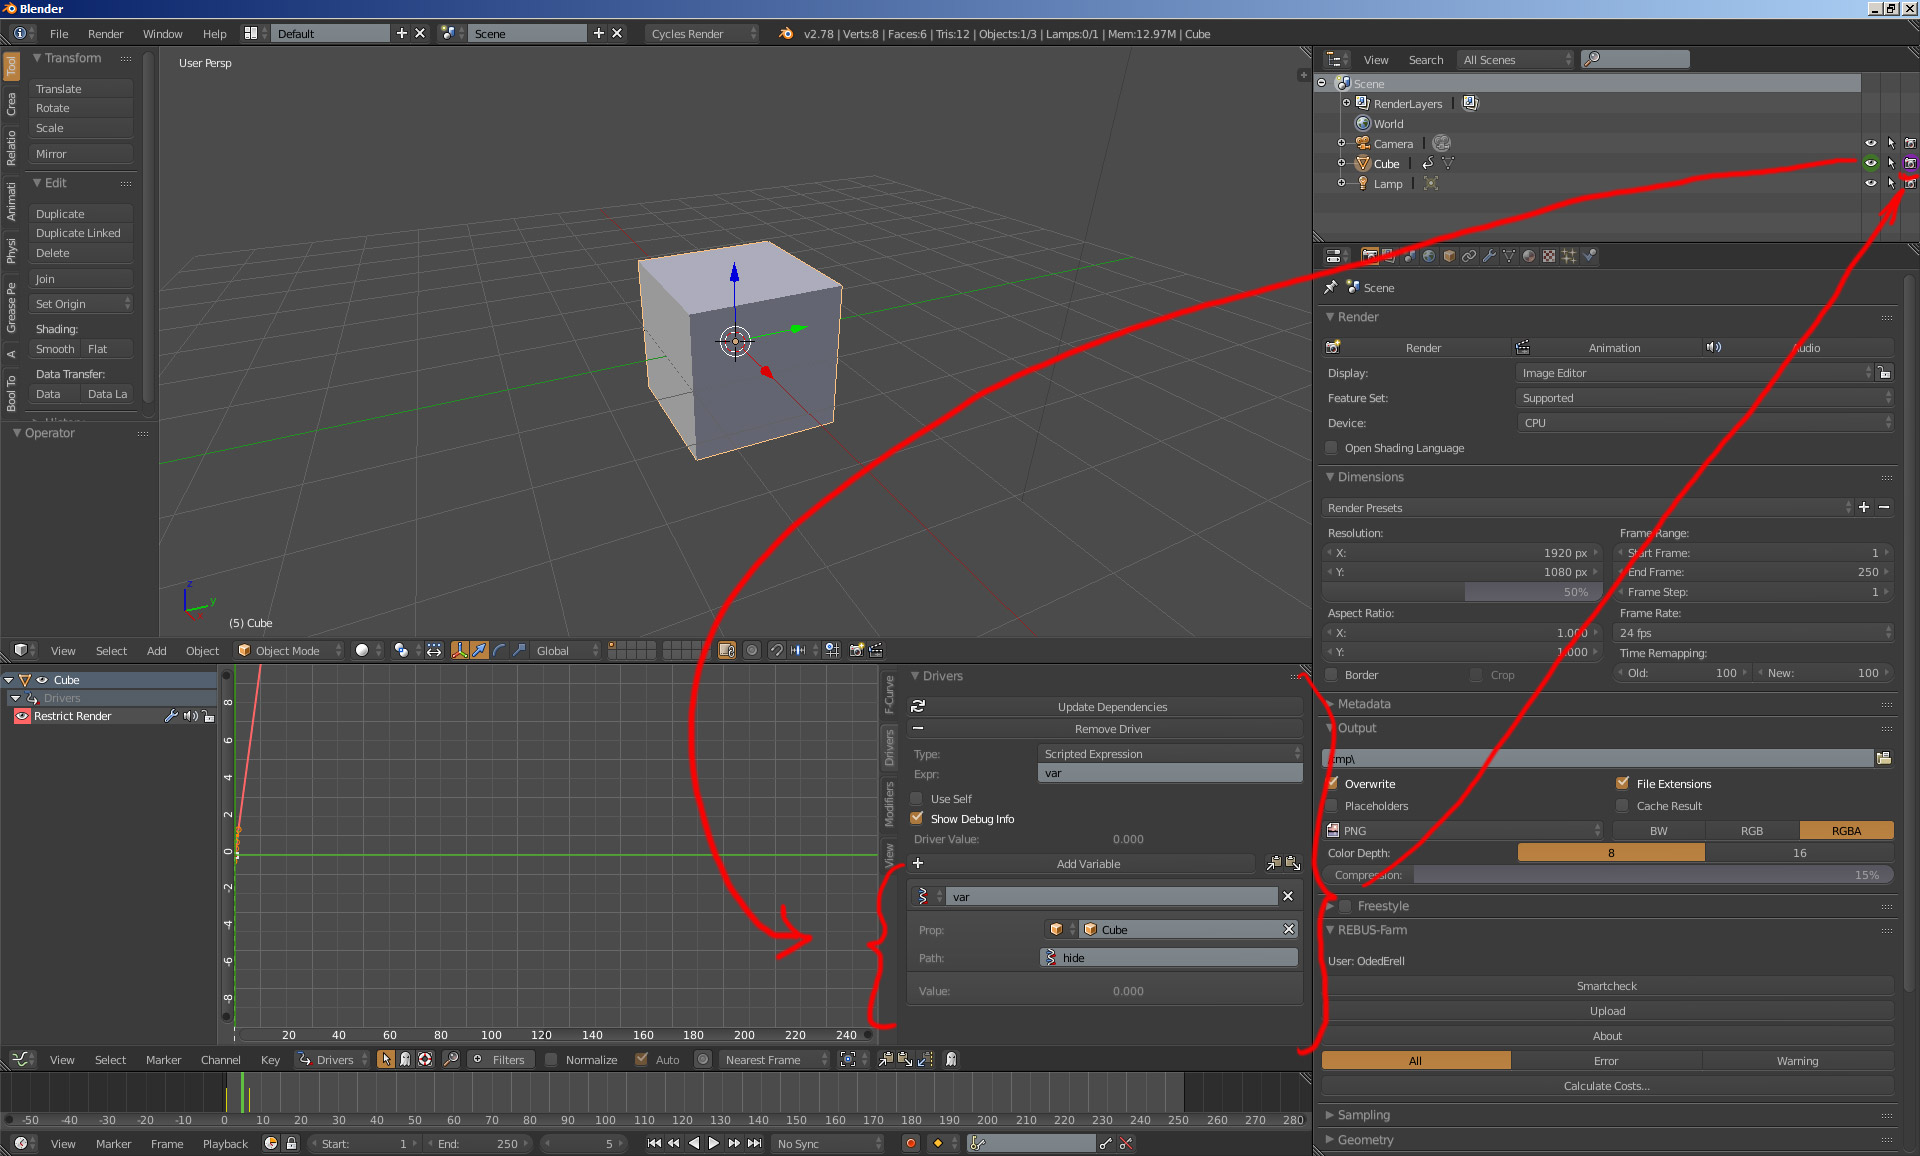
When setting key-frames to an object’s Visibility or “restrict view-port visibility” property,
Its easy to forget that it doesn’t affect the visibility in rendering but only in the view-port display.
This gave me some really nasty glitches in production when rendered animation turned out different than what I had expected.

Simple solution to that is:
Whenever an object’s visibility needs to be animated,
First thing to do is to set a Driver for the “restrict rendering” property, that would be controlled by the “restrict view-port visibility” property.
That way the animation done on view-port visibility will automatically also control rendering visibility.
What’s needed is a simple single property driver which is very simple to setup and the huge headaches can be avoided that way.

There are plenty of video tutorials about setting up drivers in Blender:
https://www.youtube.com/results?search_query=blender+2.7+drivers

Renderability_Controlled_by_Visibility