Advanced car-paint OSL shader

cglSurfaceCarPaint is an advanced car-paint OSL shader, free to download from CG-Lion studio’s website.

The cglSurfaceCarPaint car-paint material combines 3 layers:
Base: A blend of diffuse/metallic shading with a view-angle color mix
Metallic flakes: Distance blended procedural metallic flakes
Clear coat: Glossy clear coat layer with built-in procedural bump irregularity
And has been tested with:
Blender & Cycles
Maya & Arnold
3ds max & V-Ray

Download and more info

Getting started with OSL shaders


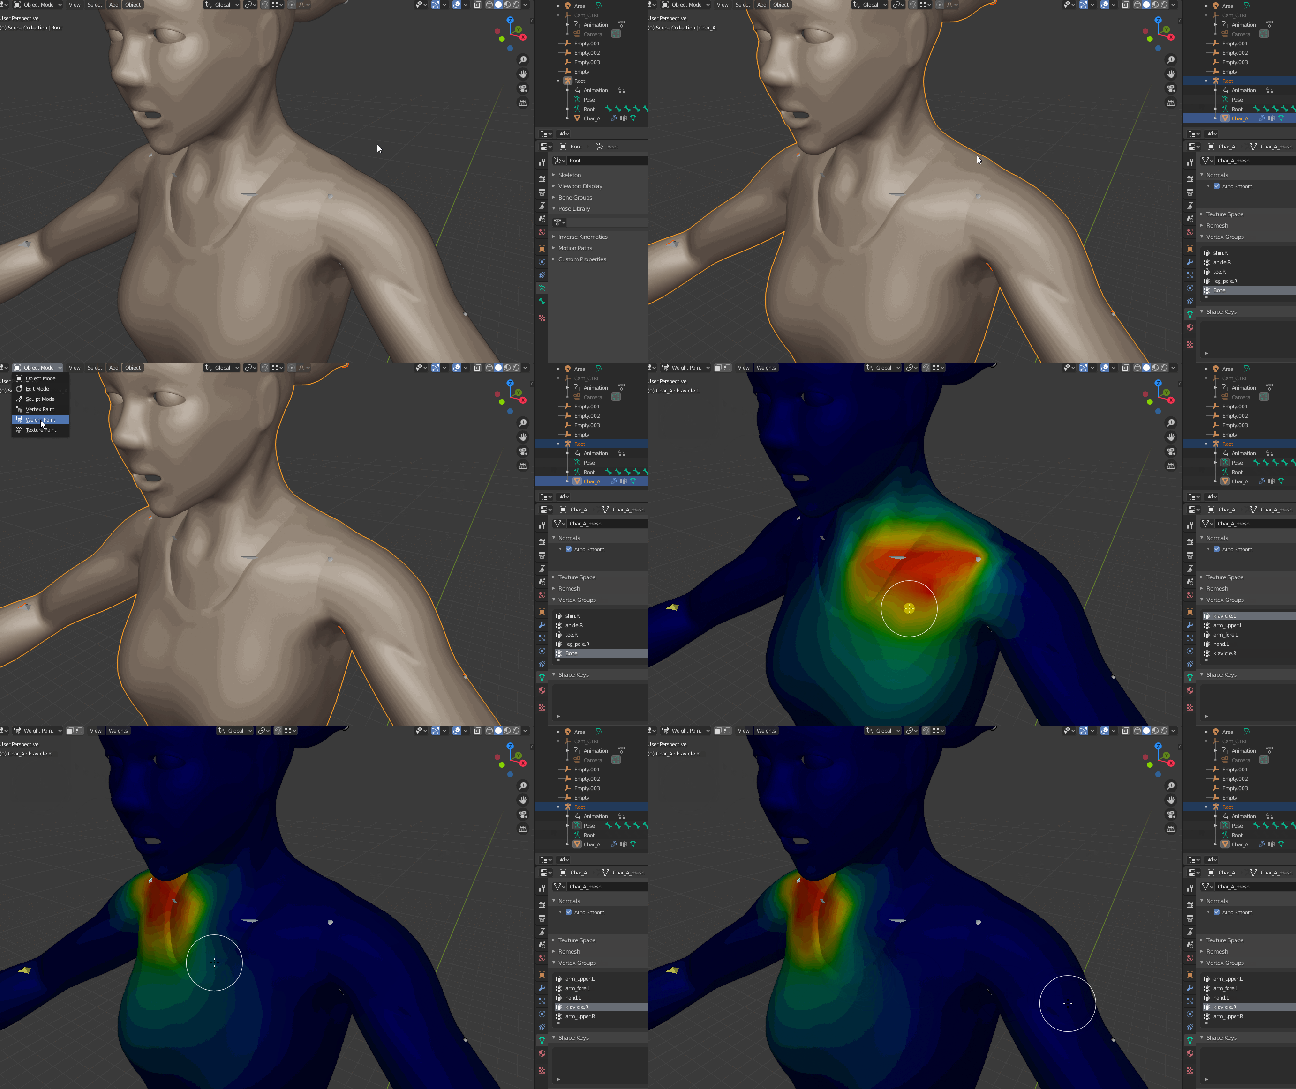
Blender 2.8 – Select bones in Weight Paint mode

Software:
Blender 2.8

To select bones while in Weight Paint mode in Blender 2.8:

  1. Select the Armature
  2. Shift select the skinned mesh
  3. Switch mode to Weight Paint
  4. Shift-Click bones to select them
    * Shift double click to select bones hidden under the mesh

Update:
This has also been verified on Blender 3.6

wpaint.gif

Customizable Photo-realistic Car-paint shader for Cycles

Software:
Blender 2.8 | Cycles Render

CGL Car Paint Presets Pack 1.0 is a highly customizable photo-realistic car-paint shader I developed for Blender & the Cycles render engine.
The shader has built-in realistic effects like color blending, metallic flakes, clear-coat etc.
And ships with 32 ready-to-use real world car paint material presets.

CGL Car Paint Presets Pack 1.0 is available on Blender Market:
https://www.blendermarket.com/products/cg-lion-car-paint-presets-pack-1

CGL_CarPaint.jpg

CGL_Cycles_Car_Paint_Presets_Pack_1.0_No_Numbers

This slideshow requires JavaScript.

Related posts:
Realistic Spotlights for Blender & Cycles
Complex Fresnel texture for Cycles
Optimized Architectural Glazing Shader for Cycles
Procedural Wood Shader for Cycles

Getting Maya 3D Paint to work

Software:
Maya 2018

Steps needed for Maya 3D Paint to work:

  1. Set a project folder and save your scene.
    * If your painting into an existing texture you can skip this step.
  2. Make sure your model has UV coordinates.
  3. Make sure your model has a basic Lambert material.
    * If you’re using a different material/shader on your model,
    Temporarily switch to Lambert just for the texture painting operation,
    And connect the original shader with the painted texture map to the surface shader input of the shading group after you’re done painting.
  4. In the Rendering tab toolbar, Double-Click the 3D Paint tool button to activate 3D Paint and also open its tool settings window.
  5. Make sure the object is selected.
  6. In the 3D Paint Settings window, go to the File Textures part,
    Choose a material attribute to paint to.
    * this would usually be Color because we are using Lambert temporarily anyway.
  7. Click Assign/Edit Textures to open the Assign/Edit Textures dialog,
    Choose a resolution and a file format for the new texture,
    And than click Assign/Edit Textures button at the bottom of the Assign/Edit Textures dialog to create the new texture and close the dialog.
    * If you already connected an existing texture file to the Lambert shader’s Color input you can skip this step.
  8. Check Update on stroke and Save texture on stroke.
  9. Set the viewport to Textured display mode.
  10. Set paint brush settings.
  11. Click the 3D Paint tool button to activate it and paint on the model surface.

Untitled-1