Daylight system for Blender

Software:
Blender 2.78

Found a simple and effective sun positioning addon for Blender,
It can be downloaded here:
https://developer.blender.org/F20492
The addon is easy to install like all other addons in Blender,
Once installed you will find it’s controls in the World settings,
You specify a sky environment map and a sun node and it will control them acording to given latitude longitude, date, timezone ect.
Also lets you set the north direction of the system as needed.

Very simple and very effective.

Related:
Photometric daylight setup in V-Ray for Maya

Render layers in Blender

Software:
Blender 2.78

I find that Render layers in Blender/Cycles render are a very useful tool for creating any kind of Render passes or AOV’s needed for compositing.
You can easily create render passes with different material overrides, or use the ability to exclude scene layers to create render passes with different light sources or different geometry.
For instance, there’s no built in World Position AOV in Blender but it’s really easy to create one using a Render layer with a World Position shader override (a world position shader can be created using an ‘Input > Geometry’ node)
Or in another case,
I thought you couldn’t have a decent AO render pass (using one scene file) because the AO shader doesn’t have a distance parameter and the Environment AO (that does have a distance parameter) produces a fake GI effect that I don’t want to have in the beauty-pass,
But using render layers it’s actually pretty easy to do because a render layer can be set to not use the environment or not use AO.
Bottom line, the Render layers feature in Blender gives you huge flexibility in creating custom output images or sequences out of a single scene in a single render job (not a single render because each render layer is rendered separately).
On top of all that the output images from all the render layers don’t have to be all packed into one gigantic EXR file,
You can use compositing operations and compositing ‘File Output’ node to determine exactly how the images will be stored in folders and files.
The ‘File Output’ node will actually create folders and store the files in them so output from one render command an be automatically stored within multiple folders.
In short.. AWESOME!!

Critical reminder:
When setting up render layers make sure you don’t forget to turn them all on when your done testing, otherwise you’l come back to the studio in the morning and find that not all the needed sequences have been rendered :-\
Blender_Render_layers

Blender Sub-D impact on animation playback

Software:
Blender 2.78

I noticed that the Subdivision Surface modifier in Blender significantly slows down the animation playback even if the mesh isn’t animated,
So my advice is, either apply the modifier when possible or set it to be disabled in viewport and enabled only in rendering.

Animating visibility in Blender

Software:
Blender 2.78

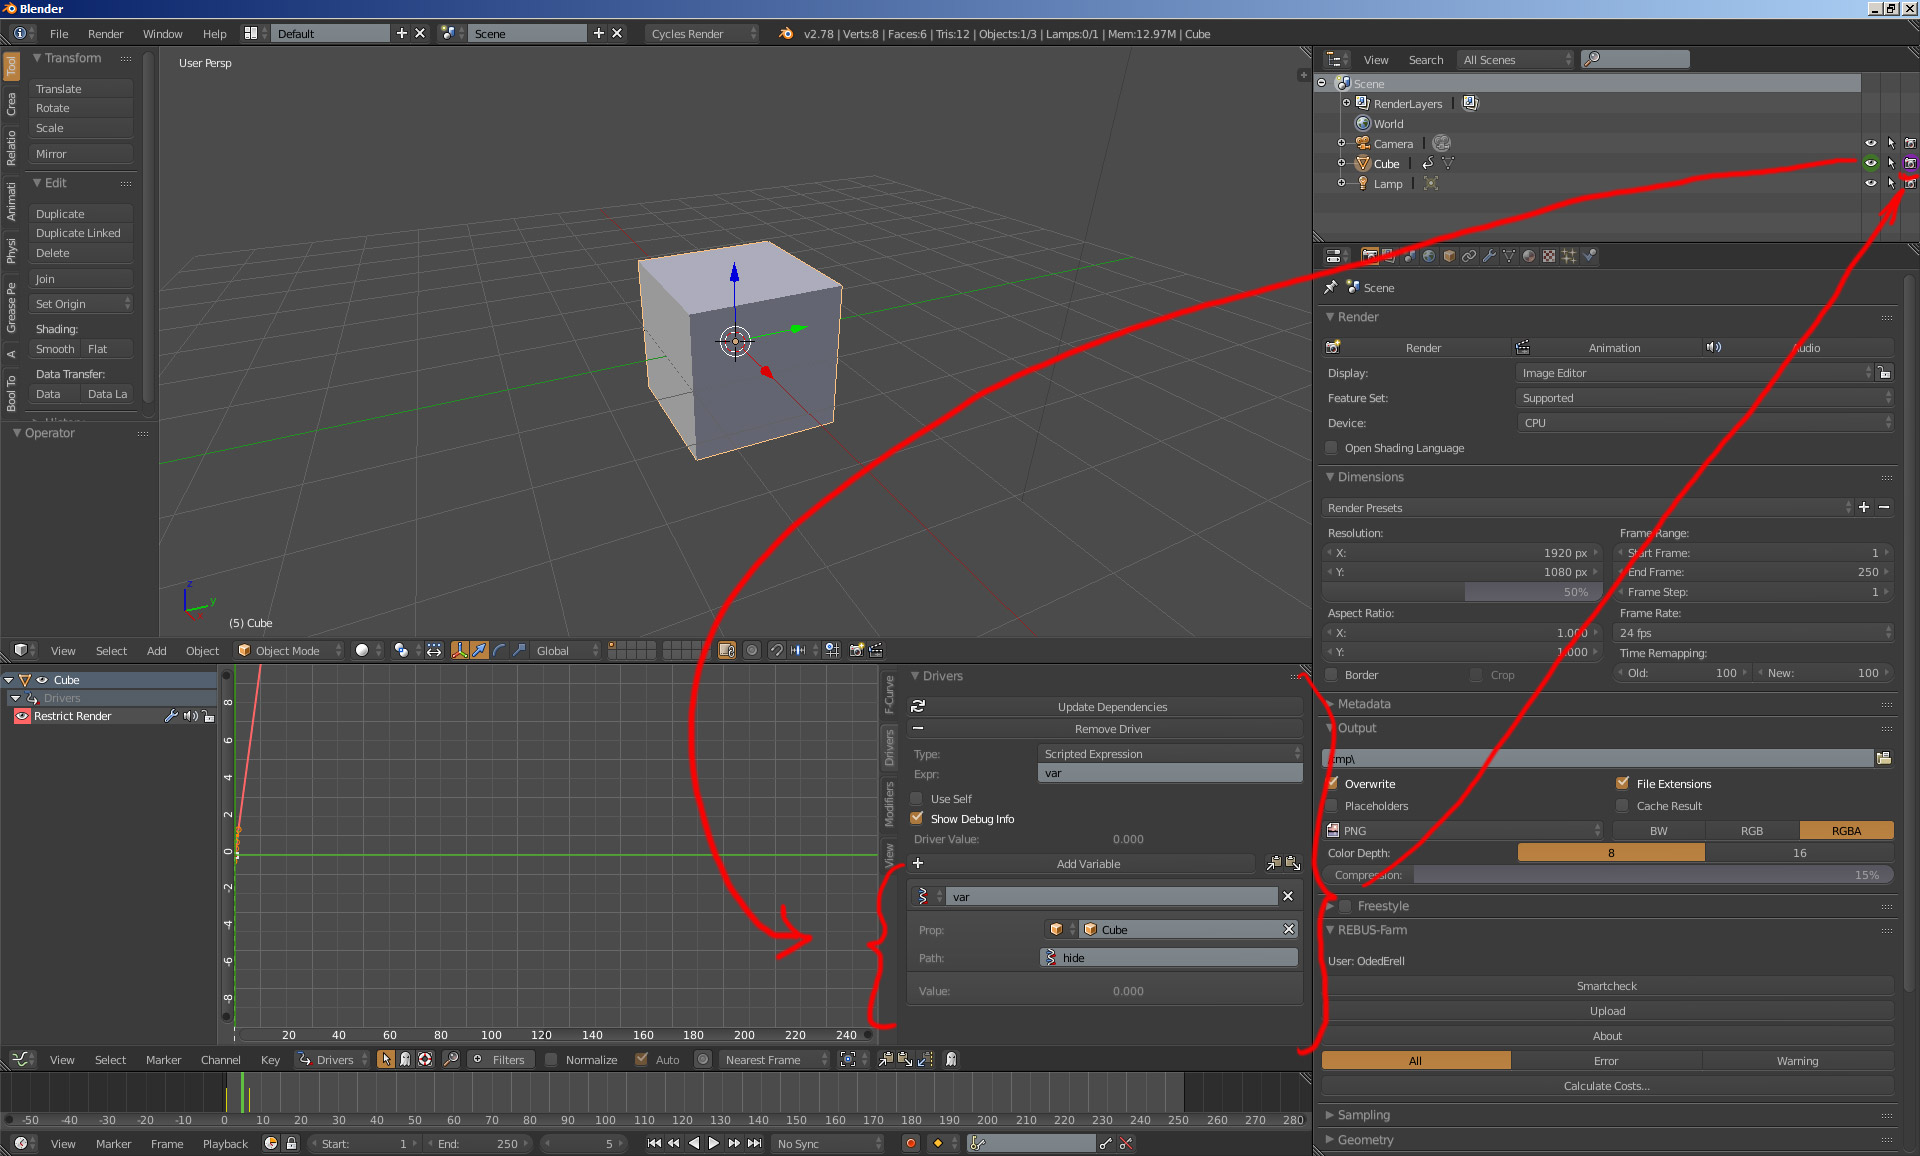
When setting key-frames to an object’s Visibility or “restrict view-port visibility” property,
Its easy to forget that it doesn’t affect the visibility in rendering but only in the view-port display.
This gave me some really nasty glitches in production when rendered animation turned out different than what I had expected.

Simple solution to that is:
Whenever an object’s visibility needs to be animated,
First thing to do is to set a Driver for the “restrict rendering” property, that would be controlled by the “restrict view-port visibility” property.
That way the animation done on view-port visibility will automatically also control rendering visibility.
What’s needed is a simple single property driver which is very simple to setup and the huge headaches can be avoided that way.

There are plenty of video tutorials about setting up drivers in Blender:
https://www.youtube.com/results?search_query=blender+2.7+drivers

Renderability_Controlled_by_Visibility