Arnold for Maya refractive caustics

Software:
Maya 2018 | Arnold 5

An account of the drastic measures that need to be taken in order to ‘persuade’ Arnold for Maya to render refractive caustics.

  1. In the refractive object’s shape attributes,
    Under ‘Arnold’, ‘Opaque’ must remain checked.
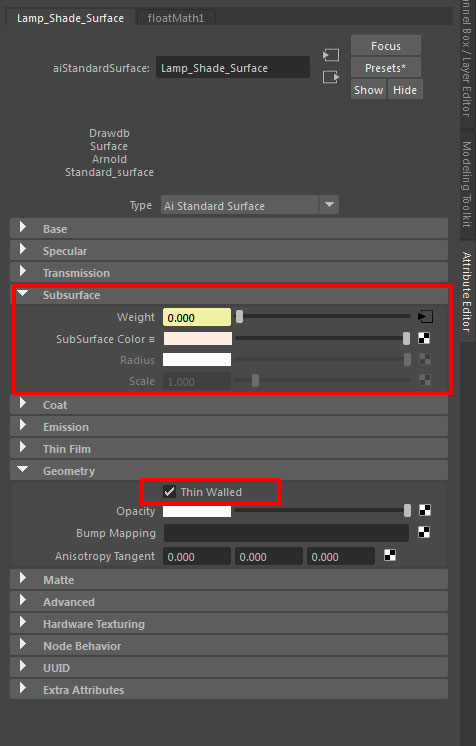
    * This is unintuitive but when refractive caustics are calculated there is no need for transparent shadows. the caustics pattern is in fact the light refracting through the object.
  2. The refractive object’s aiStandardSurface shader must have it’s Transmission layer active.
    For a colored refractive object, Transmission Weight should be 1.0,
    A color should be selected, and the density of the color should be controlled with the Depth attribute (higher values make the color less dens).
    In the shader’s advance attributes, check ‘Caustics’.
    In the shader’s Specular layer, set the IOR to match your material.
    * The default of 1.52 is the IOR for glass, and water would be IOR 1.33 for example.
  3. For refractive caustics to be rendered, the light source must be an Arnold Mesh Light,
    And in its shape attributes, under Light Attributes ‘Light Visible’ must be checked.
  4. In many cases, in order for the caustics pattern’s intensity to be correct,
    The ‘Indirect Clamp Value’ must be raised in Render Settings > Arnold Renderer, under Clamping.
  5. In some cases the Transmission value under Ray Depth in Render Settings > Arnold Renderer must be increased for the caustics to render properly.
    * Light simulation must be able refract through all the relevant surfaces.
  6. To increase the caustics render quality, the number of Diffuse samples must be raised in Render Settings > Arnold Renderer.
    * This may be unintuitive, but the caustics pattern is actually part of the Diffuse rendering of the surface upon which the caustics are appearing.

That’s it!
Hope you find this useful 🙂

Arnold_Coustics_AArnold_Coustics_BArnold_Coustics_C

Related:
>
Understanding Transparency Render Settings
>
Arnold Translucency
> Arnold Transmission Scattering


Arnold for Maya Motion-Blur

Software:
Maya 2018 | Arnold 5

  1. In the Render Settings window, Arnold Renderer tab, under Motion Blur,
    Check ‘Enable’.
  2. Set the ‘Length’ attribute to set the Motion-Blur size.
    * the default length of 0.5 means the Motion-Blur will be calculated as a result of a photographic exposure duration of half of a frame duration, or 180 degrees in cinema camera terminology.
  3. Raise the number of Keys to accurately simulate Motion-Blur for very fast rotational motion like helicopter propellers and car wheels.

Untitled-2.jpg

Note:
To generate a Motion Vector (Velocity) AOV (also referred to as ‘Render Element’ or ‘Pass’), in order to add the Motion-Blur effect in a compositing software:

  1. The ‘motionvector’ AOV must be added to the AOVs list in the AOVs tab of the Render Settings window.
  2. Motion-Blur must be enabled in the Motion-Blur part of the Arnold Renderer tab in the Render Settings window.
    * Otherwise motion vectors will not be calculated.
  3. In the Diagnostics tab of the Render Settings window, under Feature Overrides, check ‘Ignore Motion Blur’, so Motion-Blur will not be rendered.

Untitled-2

Untitled-3


Related posts:

Arnold for Maya Depth of Field (DOF)

Saving multi-channel EXR file with Arnold for Maya


Saving multi-channel EXR with Arnold for maya

Software:
Maya 2018 | Arnold 5

  1. In the Render Settings > Common tab, choose EXR as the output file format.
  2. In the Render Settings > AOVs tab, open the drop-down menu on the right side of one of the AOVs in the list, and choose Select Driver.
    This will bring up the defaultArnoldDriver node Attributes.
  3. In the defaultArnoldDriver node Attributes, under Advanced Output, check Merge AOVs.

Untitled-4

Untitled-3


Arnold for Maya Depth of Field (DOF)

Software:
Maya 2018 | Arnold 5

Untitled-2.jpg

  1. In the camera shape node’s Arnold Attributes:
    Check ‘Enable DOF’.
  2. Set ‘Aperture Size’ and ‘Focus Distance’ to control the effect.
    Note:
    The Aperture Size attribute isn’t an f-number aperture like we would expect in photography but a radius in world units.
    Larger Aperture Size values (larger lens Iris opening), and shorter Focus Distances will cause a narrower Depth of Field which will result in the background appearing more blurry.
    DOF is generally more apparent with ‘long lenses’ (shorter focal length).
  3. Set other Aperture attributes like the number of blades and aspect ration to further design the appearance of out of focus areas and especially highlights.
    * The optical effect referred by the term ‘Bokeh’ in photography.


Related Posts:

Arnold for Maya Motion-Blur

After Effects Camera Lens Blur

Arnold for Maya Standard Surface Shader Translucency / Paper Shader

Software:
Maya 2018 | Arnold 5

Translucent
In this example, the lamp shade has a Translucent material

The Subsurface component of the Arnold Standard Surface shader (aiStandardSurface) controls Sub Surface Scattering (SSS).
When the ‘Thin Walled’ option is checked in the Geometry attributes of the shader, the Subsurface isn’t rendered as a full volume of material like soap or skin/flesh (the effect that is traditionally called Subsurface Scattering – SSS) but as a thin paper-like translucent surface like paper, thin cloth thin leaves, lamp shades etc. (the effect traditionally called Translucency or ‘Paper Shader’)

* Note that this option is suitable mainly for polygon surfaces without thickness (just one side)

Untitled-1

To create a Translucent shader with Arnold:

Subsurface Weight must be higher than 0.0 for the effect to be computed.

In Geometry, check Thin Walled for the SSS to be rendered as Translucency (Paper Shader).

Extra options:

Use samplerInfo Node Facing Ratio output in Subsurface weight to add realism by changing the weight by angle.

Multiply weave texture with Facing Ratio to simulate fabric translucency.

Untitled-3.jpg

Related:
> Understanding Transparency Render Settings
> Arnold Transmission Scattering
> Arnold Refractive Caustics

Arnold renderer – First impressions

Software:
Maya 2018 | Arnold 5

As a 3D rendering instructor I’ve been recently required to get familiar with rendering animations using Arnold for Maya so that I’ll be able to train VFX / Animation students to do so.

So today, after about 15 years since the last time I worked with Maya, I installed the latest version of the software’s educational edition on my PC, and started finding my way around the basics, and rendering with the Arnold renderer.

So obviously, the Arnold renderer is a state of the art production ray-tracer for the film VFX industry, and it sure feels that way with its no-nonsense super-realistic uncompromising physical approach to all the aspects of rendering, giving the artist total freedom to configure whatever he or she can possibly want,
And for someone with an understanding of physical definitions of light sources, optical attributes of surfaces, physical shaders and the technical process of ray-tracing, it’s an absolute joy to use.

So what’s the problem?

The problem is that the Arnold renderer wasn’t developed as a practical rendering solution for independent artists relaying on one or two PC CPU’s as the main rendering work force.
Arnold’s Brute Force rendering approach is very convenient to use and provides awesome shading quality, but it requires massive processing power to be practical in production of animations, even with today’s multicore desktop CPU revolution that was started with AMD launching the Ryzen chips.

* I must admit that (in the field of 3D visualization) I got spoiled by using Mental Ray and V-Ray over the years and got used to rendering with at least 3 bounces of indirect diffuse illumination,
Something that using interpolated GI calculations like irradiance caching and such can be done relatively fast on a desktop PC, but using accurate Brute Force to do it (on a desktop PC CPU) makes it impractically too slow.

The good news:

A) The GPU rendering revolution that was enabled by the nVidia Cuda technology is making massively parallel Brute Force rendering practical at a fraction of the price of CPU processing power.
Example:
About 3 years ago I decided I must check what’s this “Cuda rendering” all about, so I purchased a Geforce Gtx Titan Black GPU (Geforce 7 series) for about 1200$.
That GPU had Brute Force rendering power equivalent to about 16 3Ghz CPU cores.
Today you can get the same speed and memory with a 300$ Geforce Gtx 1060 GPU.
But Arnold isn’t a GPU renderer.. one may rightfully say….
* It should be said that GPU rendering is currently limited in the amount of memory compared to CPU rendering, and also OSL shaders are not supported.

B) Cycles renderer, Blender’s own built-in render engine is a GPU renderer, and it’s very similar to Arnold in its highly physical no-nonsense Brute Force rendering approach.
So if you wish to enjoy an “Arnold Style” physical shading and Brute Force rendering workflow in a small indie studio environment, GPU rendering with Blender and Cycles is a good way to do that, plus the software is free.
A relatively modest investment in 2 Geforce Gtx 1070 GPUs will give you Brute force rendering power roughly equivalent to 40 3Ghz CPU cores, at about a 4th or a 5th of the price it would cost in CPU’s.

All that being said..
Arnold is absolutely awesome! 😀

Update:
It seam that a version of Arnold that can render on GPU is on it’s way, and this is great news!