Blender 2.8 – Select bones in Weight Paint mode

Software:
Blender 2.8

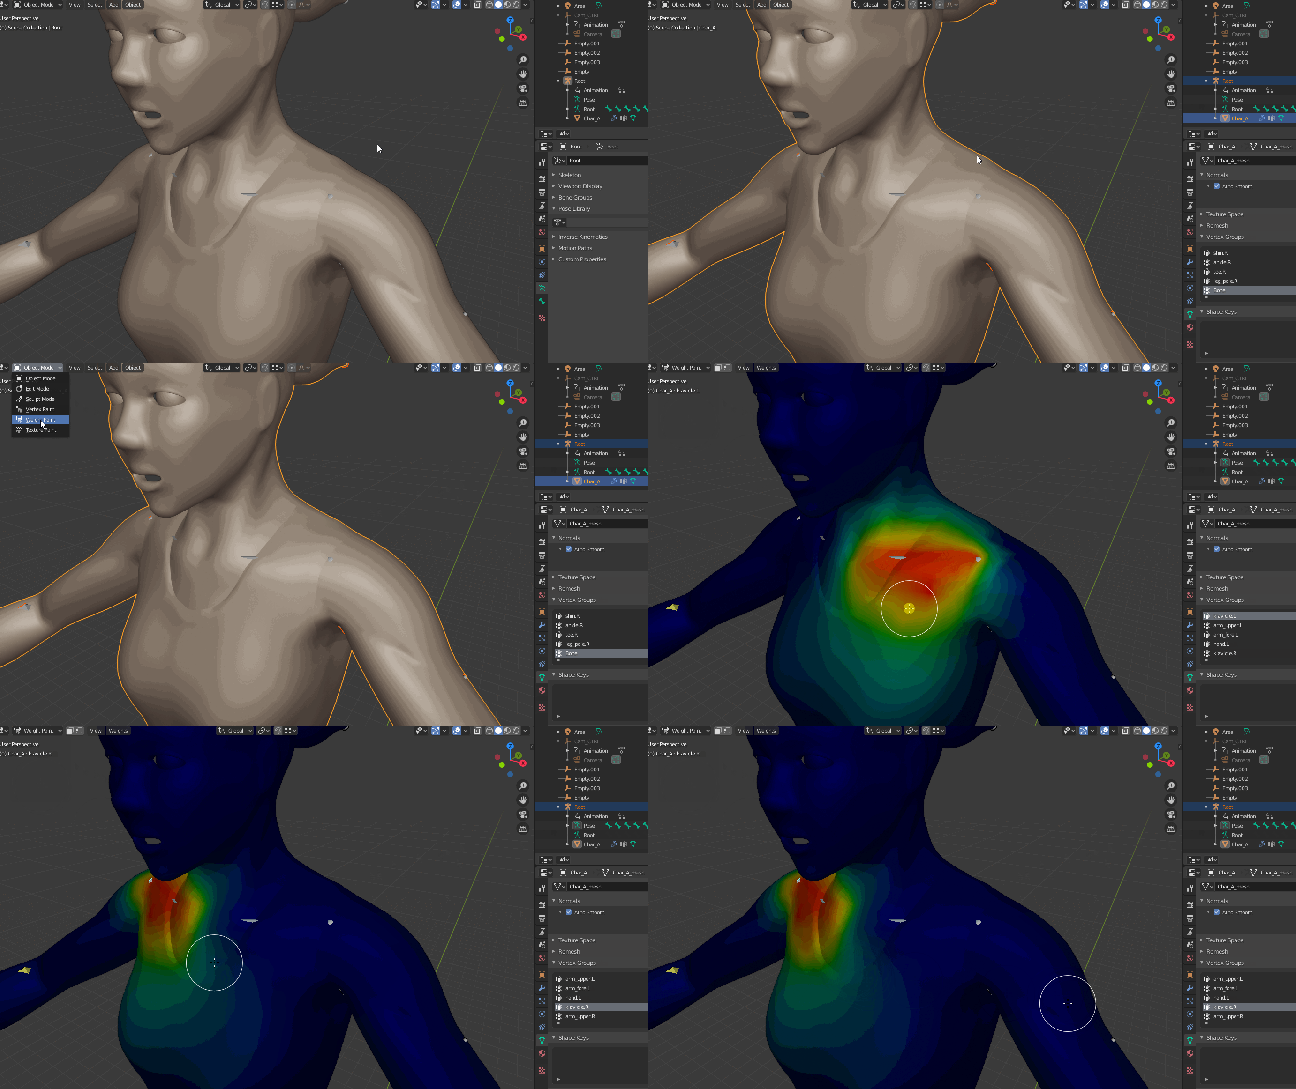
To select bones while in Weight Paint mode in Blender 2.8:

  1. Select the Armature
  2. Shift select the skinned mesh
  3. Switch mode to Weight Paint
  4. Shift-Click bones to select them
    * Shift double click to select bones hidden under the mesh

Update:
This has also been verified on Blender 3.6

wpaint.gif

Blender – Copy Bone Constraints

Software:
Blender 2.83

To copy bone constraints from one bone to other bones:

  1. In Blender Preferences > Add-ons:
    Find the Interface: Copy Attributes Menu add-on, and enable it.
    Annotation 2019-12-12 165824
  2. In Armature Pose Mode,
    Select one or more bones, and select last the bone that has the constraints you want to copy.
  3. Press Ctrl + C to open the Copy Attributes menu, and select Copy Bone Constraints.

copyconstraints


Related post:

Quickly setup bone constraints

Blender – Modeling character clothes using cloth simulation

Software:
Blender 2.8

This character project is the first one in which I’m using physical cloth simulation in Blender to model the character’s clothes at proxy quality (they will be detailed further manually). learning this approach to clothes modeling demanded a lot experiments, trials and errors to get it right, in this short article, I’ll try to provide some insights, tips, and settings that can speed up the process.

Watch the full modeling process here

General notes and tips:

  1. When modeling the basic shape of the cloth try to “cut” a realistic cloth pattern for your desired cloth model. if you’ll search images on the web for “trousers cutting pattern” or “coat cutting pattern” you’ll find many examples.
    * See images below
  2. Create proper UVs for the cloth mesh when its still flat (before the simulation)
  3. In Blender cloth simulation, isolated edges in the mesh (edges without polygons) are treated as sawing springs, and are an important part of the cloth setup.
  4. Use a low poly proxy model for your characters body mesh, it will speed up the cloth simulation.

Early experiments:

In this experiment I used a simple tubular pants-like mesh that I quickly modeled around the character’s legs and pelvis (not a realistic cloth cutting pattern), with the top (weist) vertices defined as a vertex group with shrinking cloth property.
The result looks like training suit pants. it wasn’t at all what I wanted for this character, but I actually like it and probably will use such pants on other characters or on this one as a secondary look.

cloth_study

In this experiment I started trying to model an actual man’s trousers cutting pattern, and as you see, it still needs tweaking.

Blender_Cloth

This experiment is beginning to produce reasonable results, the undershirt initial shape is still cut too low at the back.
* Note that there is an animated belt collision object to bring the undershirt to it’s shape at the weist

Blender_Cloth_B2

Final Settings:

The final undershirt initial model:

Annotation 2019-12-08 120355

The final pants initial model:
* Note that the belt mesh is a vertex group defined a fixed in the cloth simulation, and that it’s split to parts corresponding to the edges of the pants shape that need to be sawed to it. (see the process here)

Annotation 2019-12-08 120618

The full final cloth setup for the character. the setup includes a low poly collision object of the whole character and shoes, undershirt mesh, pans mesh and animated (contracting) belt collision for the undershirt:

Annotation 2019-12-08 120941

The final cloth simulation:

cloth

cf

cb

Cloth Settings:

Cloth simulation settings for the undershirt:

cloth_undershirt

Cloth simulation settings for the pants:

cloth_pants.jpg

Related posts:
Blender 2.8 Character Project
Blender 2.8 character project

Software:
Blender 2.8

feature

I Recently started a personal character modeling project using Blender 2.8.
The project has the following goals:

  1. Get back to development of creative 3D content (character development, animation, rigging etc.).
    * the last 10 years or so I have been generally doing (and teaching) photorealistic rendering for technical visualization projects.
  2. Get used to Blender 2.8
  3. Practice A sculpting > re-topology workflow.
    * When I learned organic modeling 20 ago, there was no such workflow, you would create final topology from the get go.

I will be video capturing the whole project’s progress and sharing it on my vimeo channel.

You’re welcome to read about the project creation steps and watch the actual work process captured here:

  1. Part 1 – Sculpting – Freestyle rough draft
  2. Part 2 – Sculpting – Refining the model
  3. Part 3 – Modeling proxy clothes and props

Blender 2.8 character project – Part 3 – Modeling proxy clothes and props

Software:
Blender 2.8

This is the third part of a personal project I began working on,
Development of a realistic character in Blender 2.8 for games and animation.

<– Go to the project home
<– Go to the first part of the project
<– Go to the second part of the project

The third part of the project was a ~7 hour modeling session in which the focus was mainly on proxy-quality (rough) modeling of clothing and props.
In this stage of the project, I decided that the creative theme for character will be a tough detective. a sort of an Asian ‘Dirty harry’ character, and this concept was the drive behind the styling of the characters clothes and and props.


Result after part 3:

> Total accumulated work time: ~17.5 hours


Some tips and settings for modeling the clothes


Blender 2.8 character project – Part 2 – Sculpting – Refining the model

Software:
Blender 2.8

This is the second part of a personal project I began working on,
Development of a realistic character in Blender 2.8 for games and animation.

I will be video capturing the whole project’s progress and sharing it on my vimeo channel.

<– Go to the project home
<– Go to the first part of the project

The second part of the project was a ~5 hour sculpting session focused mainly on refining the model, improving its proportions and anatomical detail, and adding internal parts like eyeballs and teeth.
In this part the character design was developed into a more masculine man and less skinny, the general idea still being an elder Asian action figure.

Result after part 2:
> Total accumulated work time: ~10.5 hours

tt_25.06.19.gif


Go to part 3 of the project –>

Blender 2.8 character project – Part 1 – Sculpting – Freestyle rough draft

Software:
Blender 2.8

This is the first part of a personal project I began working on,
Development of a realistic character in Blender 2.8 for games and animation.

<– Go to the project home

The first step of the project is a completely free-style / free-form ~5.5 hour sculpting session in which I’m not really trying to do anything accurate but just get used to 3D sculpting in Blender 2.8.
I’m imagining an elder Asian action character, at this point not sure what he’ll end up being. possible themes are:
ninja, samurai, cyber themed ninja or tough detective.

Result after part 1:
> Total accumulated work time: ~5.5 hours


Go to part 2 of the project –>

Blender Python – Accessing mesh triangles

Software:
Blender 2.81 | Python 3.74

By default, mesh triangles are not accessible to Python in Blender.
When accessing the mesh triangles is needed, they must be calculated first using the ‘calc_loop_triangles’ Mesh object method.
Before the calc_loop_triangle method has been called, the loop_triangles property of the Mesh object will reference a empty collection.
After calling the calc_loop_triangles method, the loop_triangles property will reference a collection of MeshLoopTriangle objects, in which the vertices property will hold an array of 3 integers that are the indices of the triangle vertices.

The following example script creates and places sphere objects at the centers of the cube’s triangles:

import bpy
mesh = bpy.data.objects['Cube'].data
mesh.calc_loop_triangles()
for tri in mesh.loop_triangles:
     tri_center = (mesh.vertices[tri.vertices[0]].co * 0.333) +\
                  (mesh.vertices[tri.vertices[1]].co * 0.333) +\
                  (mesh.vertices[tri.vertices[2]].co * 0.333)
     bpy.ops.mesh.primitive_uv_sphere_add(radius=0.1,
                                          enter_editmode=False, 
                                          location=tri_center)

* note that when copying and pasting a script from this example, the indentation may not be pasted correctly.

Download and example file here

Annotation 2019-11-23 224800.jpg
Related:
Python for Blender – Batch Rename Objects

Advanced Procedural Wood for Blender & Cycles

Software:
Blender 2.8 | Cycles

CG-Lion Wood Presets Pack 1.0 is an advanced 3D procedural wood shader I developed for Blender and the Cycles render engine that produces consistent wood pattern on all sides of the model without requiring UV coordinates.
The shader has many tweak-able parameters for easy customization of the wood pattern, and also has built-in varnish coat and paint layers.
CG-Lion Wood Presets Pack 1.0 ships with a ready-to-use material preset library.

CG-Lion Wood Presets Pack 1.0 is available on Blender Market:
https://blendermarket.com/products/cg-lion-wood-presets-pack-1

CGL_Wood_Presets_Pack_1.0_Node_B.jpg

This slideshow requires JavaScript.

CGL_Wood_Presets_Pack_1.0_Previews_Natural

CGL_Wood_Presets_Pack_1.0_Previews_Matte_Varnished

CGL_Wood_Presets_Pack_1.0_Previews_Varnished

Related:
Realistic Spotlights for Blender & Cycles
Optimized Architectural Glazing Shader for Cycles
Customizable Photo-realistic Car-paint shader for Cycles


Blender Skeleton (Armature) Mirroring

Software:
Blender 2.8

To mirror a skeleton (Armature) in Blender:

  1. Create bones for one side of the rig and name them with “.L” for Left or “.R” for right.
  2. Select all the bones on that side.
  3. In Armature Edit Mode choose:
    Armature > Symmetrize

Blender will create mirrored copies of all the bones with respect to the Armature origin and flip their names to names ending with the opposite side.

  • When editing properly symmetrized bones,
    The X-Axis Mirror tool option will simultaneously update both sides of the Armature to maintain symmetry.

Untitled-1


Untitled-3.jpg

Untitled-4